
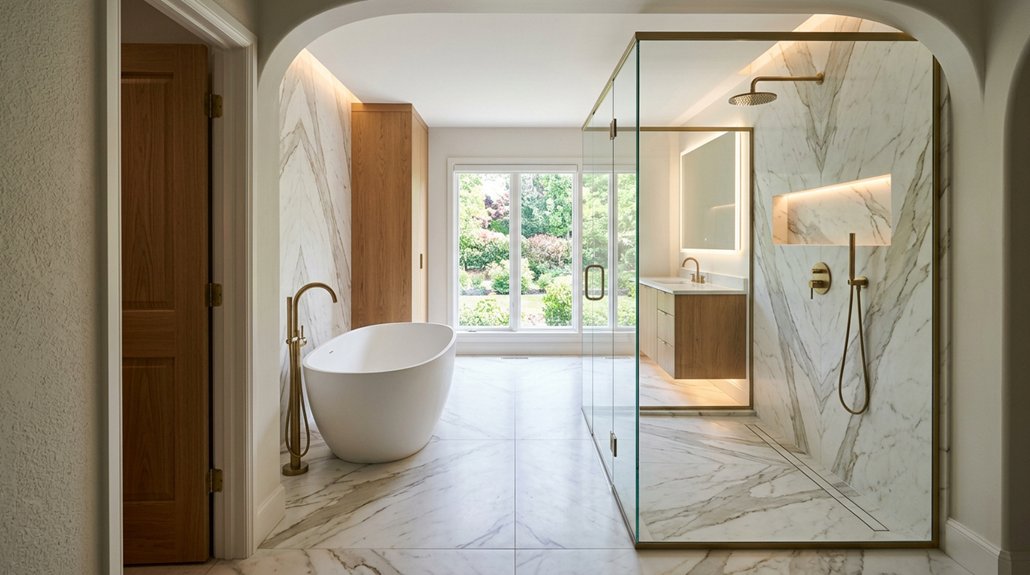
A luxury bathroom remodel starts with a measured plan, clear priorities, and a budget that covers design, labor, permits, materials, and contingencies. You’ll choose fixtures and finishes for fit, durability, and maintenance, then protect wet areas with a compatible, continuous waterproofing system. Your team will coordinate the drain, pan, and tile layout, maintaining a consistent slope of about ¼ inch per foot. Careful installation and inspection help protect your investment; the steps ahead show how each detail comes together.
Plan Your Luxury Bathroom Remodel

Start your luxury bathroom remodel by defining how you’ll use the space, what you’re willing to spend, and which features matter most. List daily routines, storage needs, accessibility requirements, and any changes to plumbing or electrical systems. Choose colours for the towel radiators that blend in with the decor.
Set a firm budget that includes design, labor, permits, materials, and a contingency for concealed damage. Then rank priorities so you can protect essential work if costs rise.
Consider spa-inspired features, such as a steam shower or heated flooring, and check whether your home’s ventilation and electrical capacity can support them.
Choose eco-friendly materials that meet durability and moisture-resistance requirements, and verify their maintenance needs.
Measure the room and document existing conditions before planning layouts.
Ask your contractor to assess subfloor stability, drainage, and waterproofing needs early.
A clear scope helps you compare proposals and prevent costly changes.
Choose Fixtures and Finishes for Your Bathroom
Choose fixtures and finishes that suit your bathroom’s layout, moisture levels, and maintenance needs. Start by measuring clearances around the vanity, toilet, and shower so doors and drawers open freely. Select Elegant fixtures with compatible flow rates, durable cartridges, and controls you can reach comfortably. Match faucet and shower finishes for a coordinated look, but check manufacturer care instructions before choosing a coating.
For counters, flooring, and wall surfaces, compare porosity, slip resistance, stain tolerance, and cleaning requirements. Premium finishes should perform as well as they look; choose materials rated for bathroom use and suited to your household’s routine.
Coordinate color, texture, and hardware scale with the room’s lighting and proportions. Confirm product dimensions, installation requirements, and replacement-part availability before ordering, so your selections fit the design and remain practical over time.
Waterproof Your Luxury Bathroom Remodel
Because water can travel behind tile and into framing, waterproof the shower, tub surround, and other wet areas with a continuous membrane beneath the finish. Choose a sheet or liquid-applied system rated for your substrate, then follow its specified overlaps, thickness, and curing times.
Seal corners, seams, niches, benches, and pipe penetrations with compatible components; small gaps can compromise the entire assembly. For steam showers, use a vapor-rated membrane across the enclosure, including the ceiling, and seal junctions to limit moisture migration.
Coordinate membrane height and detailing with your tile layout before installation. If you’re adding heated flooring, confirm the waterproofing system suits the heating assembly and place components in the manufacturer’s required sequence.
Protect the membrane during tile work, and inspect every connection before covering it. Keep product documentation for maintenance and future repairs.
Set the Shower Drain and Slope

Before installing the shower floor, position the drain to match the pan system and planned tile layout. Confirm Drain placement against the shower dimensions, plumbing route, and drain manufacturer’s requirements. Centering the drain often simplifies slope formation, while an offset location may suit the design if your pan supports it. Secure the drain body at the specified height so the grate finishes flush with the tile surface.
Complete the Slope calculation before placing the mortar bed. Measure the horizontal distance from the drain to each shower perimeter, then apply the required fall—commonly 1/4 inch per foot, subject to local code and system instructions.
Set the perimeter level consistently, accounting for any bench or curb. Shape the bed evenly toward the drain, avoiding flat spots or abrupt changes that could impede drainage. Your waterproofing system must remain continuous beneath the sloped assembly.
Finish and Inspect Your Luxury Bathroom
Once the waterproofing and tile work are complete, install fixtures, trim, and accessories according to manufacturer specifications, sealing every penetration through wet-area surfaces with compatible materials. Tighten connections without stressing supply lines, then check each fixture for leaks and stable mounting.
Complete your Lighting design with damp- or wet-rated fixtures suited to their locations. Confirm switches, dimmers, and exhaust fans operate correctly, and verify that lighting reveals surfaces without glare or dark zones.
Add Decorative accents only after you’ve cleaned grout and removed construction residue; keep textiles and accessories clear of splash areas.
Inspect tile joints, sealant beads, drain flow, and door alignment. Run the shower long enough to test drainage and containment, then examine adjacent rooms for moisture.
Record deficiencies, correct them, and retain product care instructions and warranty documents. Before handover, confirm every finish is clean, secure, and functioning as intended.
Leave a Reply